
Contents
- # Introduction
- # Step 1: Deciding What Your Agent Actually Needs to Do (and What It Shouldn’t)
- # Step 2: Picking Your Model and Framework
- # Step 3: Setting Up the Project
- # Step 4: Building the Core Agent Loop
- # Step 5: Giving It Memory and a Second Tool
- # Step 6: Adding Guardrails Before You Trust It
- # Step 7: Deploying It Somewhere Real
- # Wrapping Up
# Introduction
Most people’s first AI agent never leaves their laptop. It runs once in a terminal, prints a decent answer, and then sits there because nobody wrote the fifteen lines of glue code needed to turn a script into something other people, or other systems, can actually call. That gap between “it worked when I ran it” and “it’s live, and someone else is using it” is where most agent projects quietly die.
The numbers back this up. Close to 79% of companies say they’ve adopted AI agents in some form, but only about 11% have anything running in production, according to a 2026 statistics roundup that pulls from Gartner, McKinsey, and IDC data. That’s not a small gap. It’s the difference between a demo and a product, and it’s almost never caused by the model being too weak. It’s caused by nobody scoping the job properly, nobody handling failure, or nobody bothering to containerize the thing and put it somewhere with a URL.
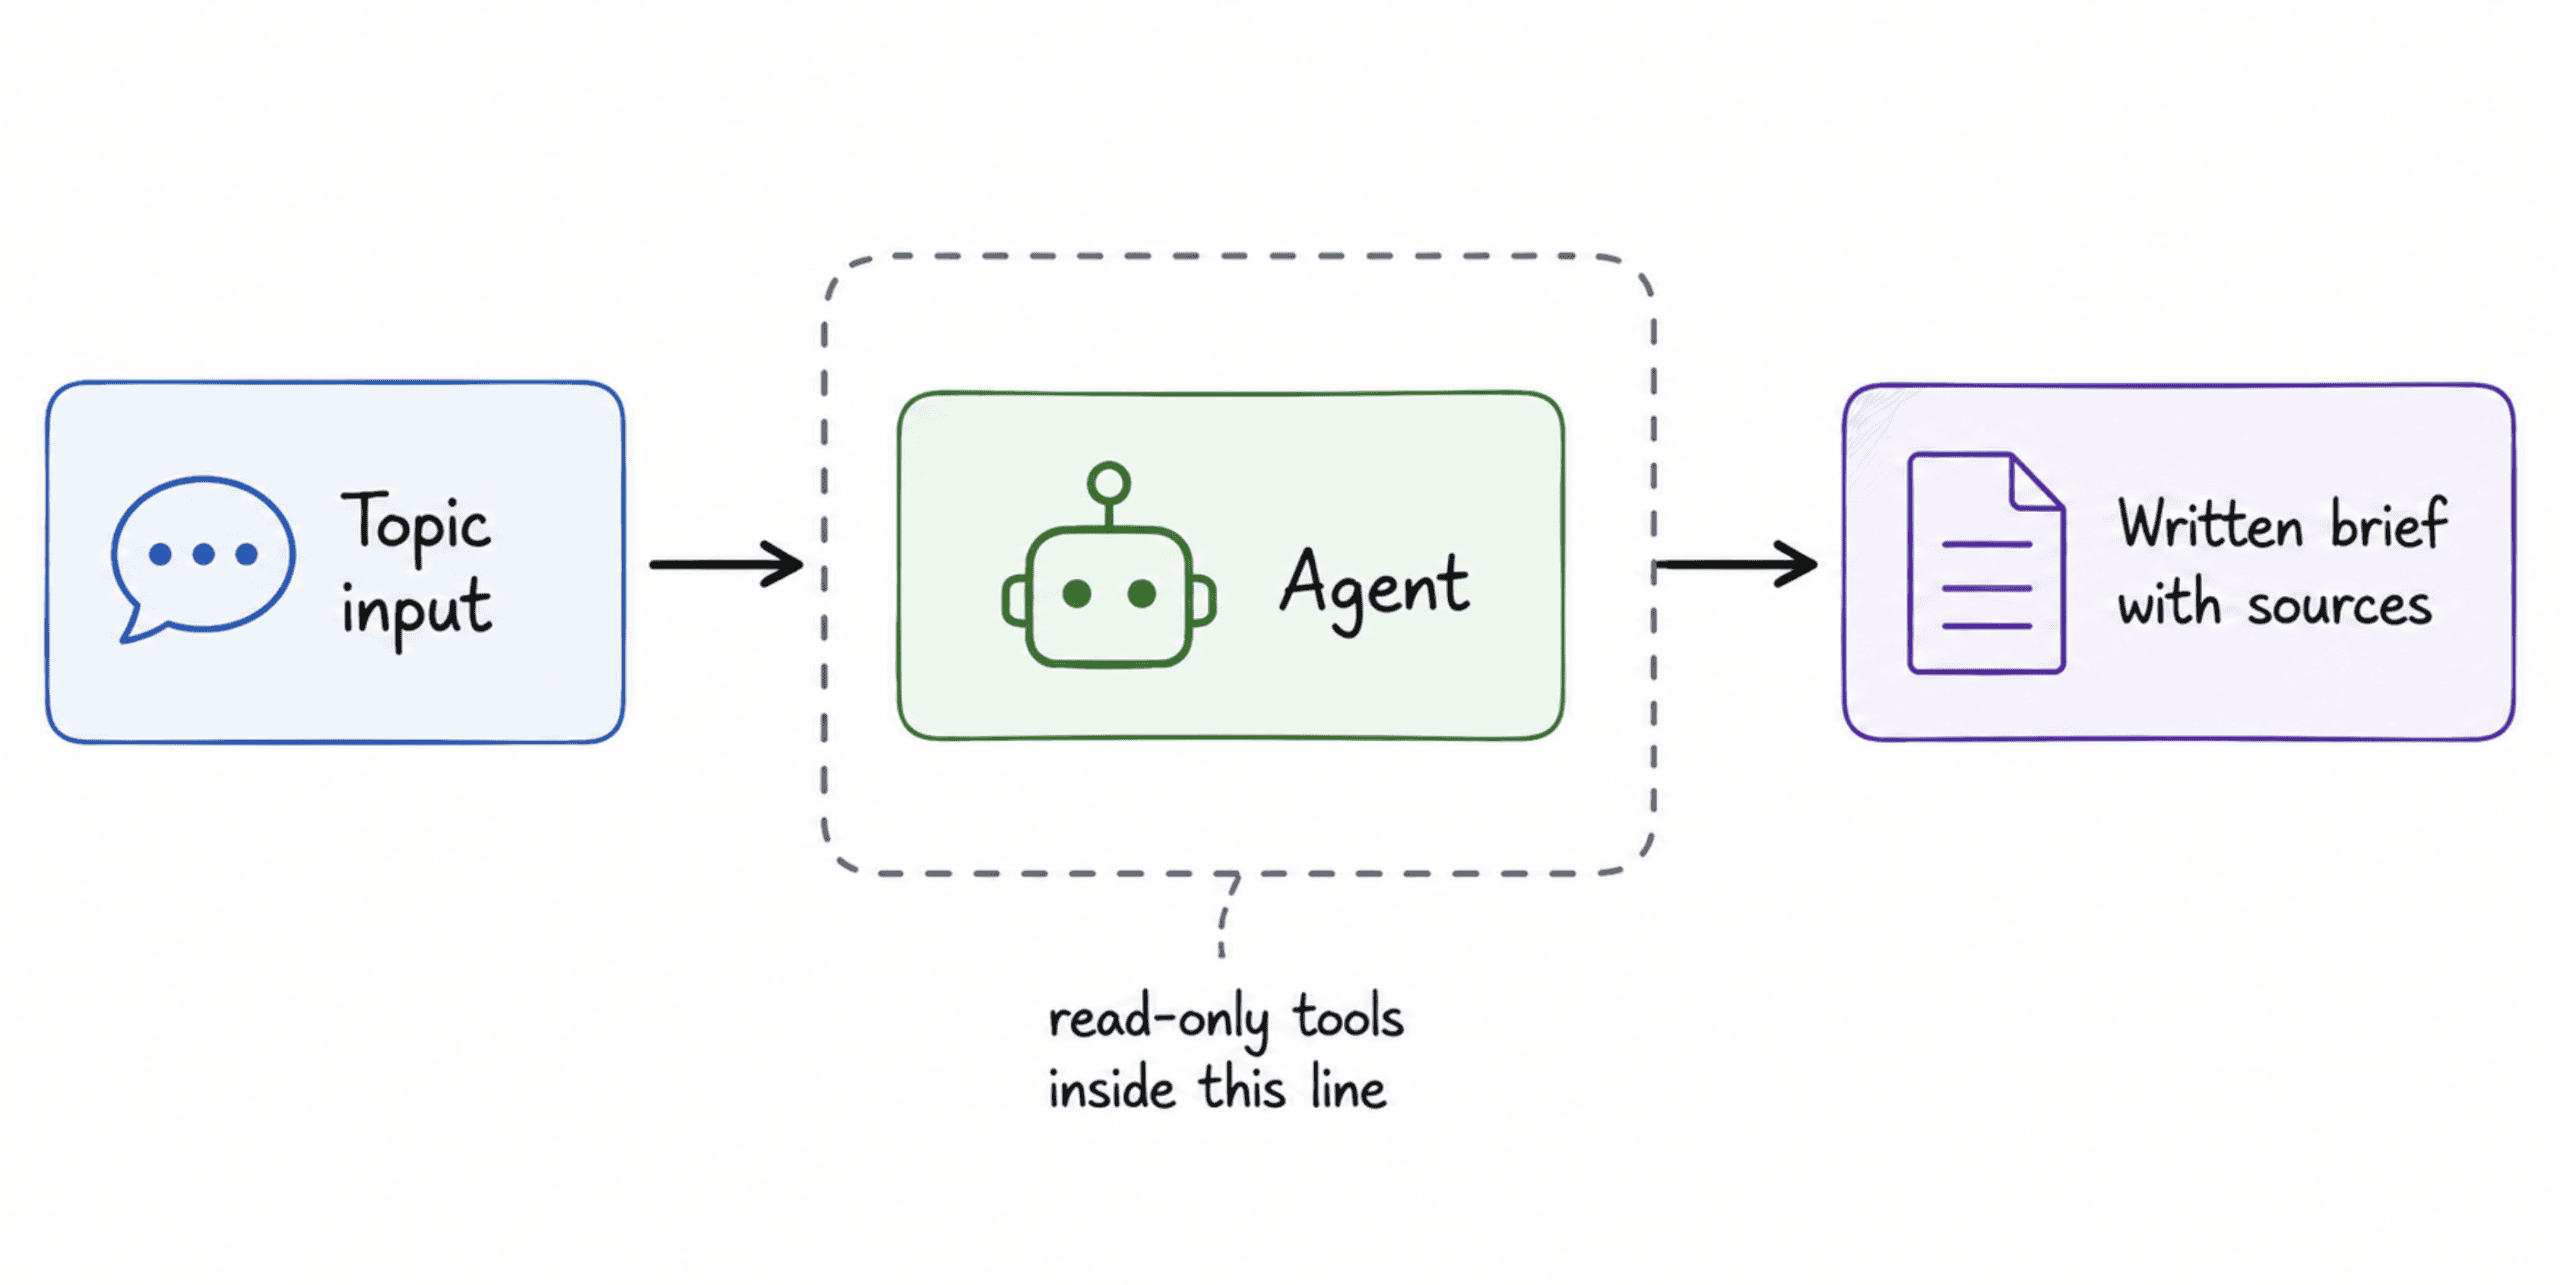
This article closes that gap for one specific project. By the end, you’ll have built and deployed a research agent: you give it a topic, it searches the web, pulls sources, and hands back a short written brief with links attached. It’s complex enough to need real tool use, memory, and guardrails, but small enough that you can build the whole thing in one sitting. Every code block below is complete and commented, and every one is followed by a plain explanation of what it’s doing and why.
One note before we start: we’re building this with LangGraph rather than CrewAI or a vendor-locked software development kit (SDK). CrewAI gets you to a working prototype faster, but LangGraph has become the closest thing to a production default for stateful agents in 2026, with built-in checkpointing and a graph model that scales past a single afternoon project without a rewrite. If you’d rather prototype in CrewAI, the concepts in steps 1, 2, 6, and 7 transfer directly; only the code in steps 4 and 5 would look different.
# Step 1: Deciding What Your Agent Actually Needs to Do (and What It Shouldn’t)
Before opening an editor, write down three things: the one job the agent does, what a successful output looks like, and what it’s never allowed to do without a human checking first.
For our research agent, that looks like this:
The job: take a topic as input, run web searches, read the results, and produce a written brief with a summary and a list of sources.
Success looks like: a coherent, factually grounded brief under 500 words, with every claim traceable to a source URL.
The hard boundary: it can search and read freely, but it never posts anything, sends anything, or writes to a file outside its own workspace without a person approving it first.
That third point matters more than it sounds. Skipping this step is a big part of why Gartner expects more than 40% of agentic AI projects to be canceled by the end of 2027, usually because nobody defined the boundaries early enough and the project either did too little to be useful or too much to be trusted.
Write your own version of these three sentences for whatever you build after this tutorial. It takes five minutes and saves you from redesigning the whole thing halfway through.
# Step 2: Picking Your Model and Framework
You need two decisions here: which model does the reasoning, and which framework manages the loop of thinking, acting, and checking the result.
For the model, any current frontier model with solid tool use qualifies: Claude, GPT, and Gemini all work here. We’ll use Claude in the code below because its tool-calling has been consistently reliable for multi-step tasks, but swapping in another provider only changes one line.
For the framework, here’s where things stand heading into the second half of 2026, based on a comparison of production agent frameworks and a separate framework decision guide:
- LangGraph models your agent as nodes and edges in a graph, with built-in checkpointing so a crashed run can pick back up instead of restarting. It has crossed 38 million monthly PyPI downloads and is what companies like Klarna, Uber, and LinkedIn run in production. The tradeoff is a steeper learning curve, usually a week or two before it clicks.
- CrewAI models agents as a “crew” with roles and goals, and you can have something working in under 20 lines of code. It’s the fastest way to validate an idea, and it has picked up over 44,000 GitHub stars, but it hands you less control once a workflow gets complicated, and teams commonly outgrow it and migrate to LangGraph.
- AutoGen, once a default choice for multi-agent conversation patterns, is worth mentioning only to steer you away from it for new projects. Microsoft has moved it into maintenance mode and shifted development to the unified Microsoft Agent Framework, so it’s not where you want to build something new in 2026.
- Vendor SDKs like the OpenAI Agents SDK or Anthropic’s Claude Agent SDK are worth a look if you’re fully committed to one provider and want the least amount of framework overhead, but they lock you to that vendor’s models.
We’re using LangGraph for this build because a research agent benefits from the checkpointing (a search that times out shouldn’t mean starting over), and because it’s the version of this skill that transfers most directly to a real production job.
# Step 3: Setting Up the Project
Create a folder, a virtual environment, and install what you need.
# Create and enter the project folder
mkdir research-agent && cd research-agent

# Create a virtual environment so dependencies stay isolated
python3 -m venv venv
source venv/bin/activate   # on Windows use: venvScriptsactivate

# Install the core libraries:
# langgraph - the agent orchestration framework
# langchain-anthropic - lets LangGraph call Claude models
# langchain-community - gives us the Tavily search tool and the page loader
# beautifulsoup4 - the HTML parser the page loader depends on
# python-dotenv - loads API keys from a .env file instead of hardcoding them
pip install langgraph langchain-anthropic langchain-community python-dotenv tavily-python beautifulsoup4
What this does: the virtual environment keeps this project’s packages separate from anything else on your machine, which avoids the classic problem of one project’s dependency update silently breaking another. The packages we install cover orchestration (langgraph), the model connection (langchain-anthropic), a ready-made web search tool and page loader (langchain-community plus tavily-python and beautifulsoup4), and safe key management (python-dotenv).
Next, create a .env file in the project root to hold your keys. You’ll need an Anthropic API key from the Anthropic Console and a search API key from Tavily, which offers a free tier that’s more than enough for this tutorial.
# .env file, never commit this to version control
ANTHROPIC_API_KEY=your-anthropic-key-here
TAVILY_API_KEY=your-tavily-key-here
Finally, set up the folder structure:
research-agent/
├── venv/
├── .env
├── .gitignore
├── agent.py
├── app.py
├── requirements.txt
└── Dockerfile
What this does: separating agent.py (the agent logic) from app.py (the web server that exposes it) keeps the code readable and means you can test the agent directly in a terminal before wrapping it in an API. Add .env and venv/ to your .gitignore so your keys never end up in a repository.
# Step 4: Building the Core Agent Loop
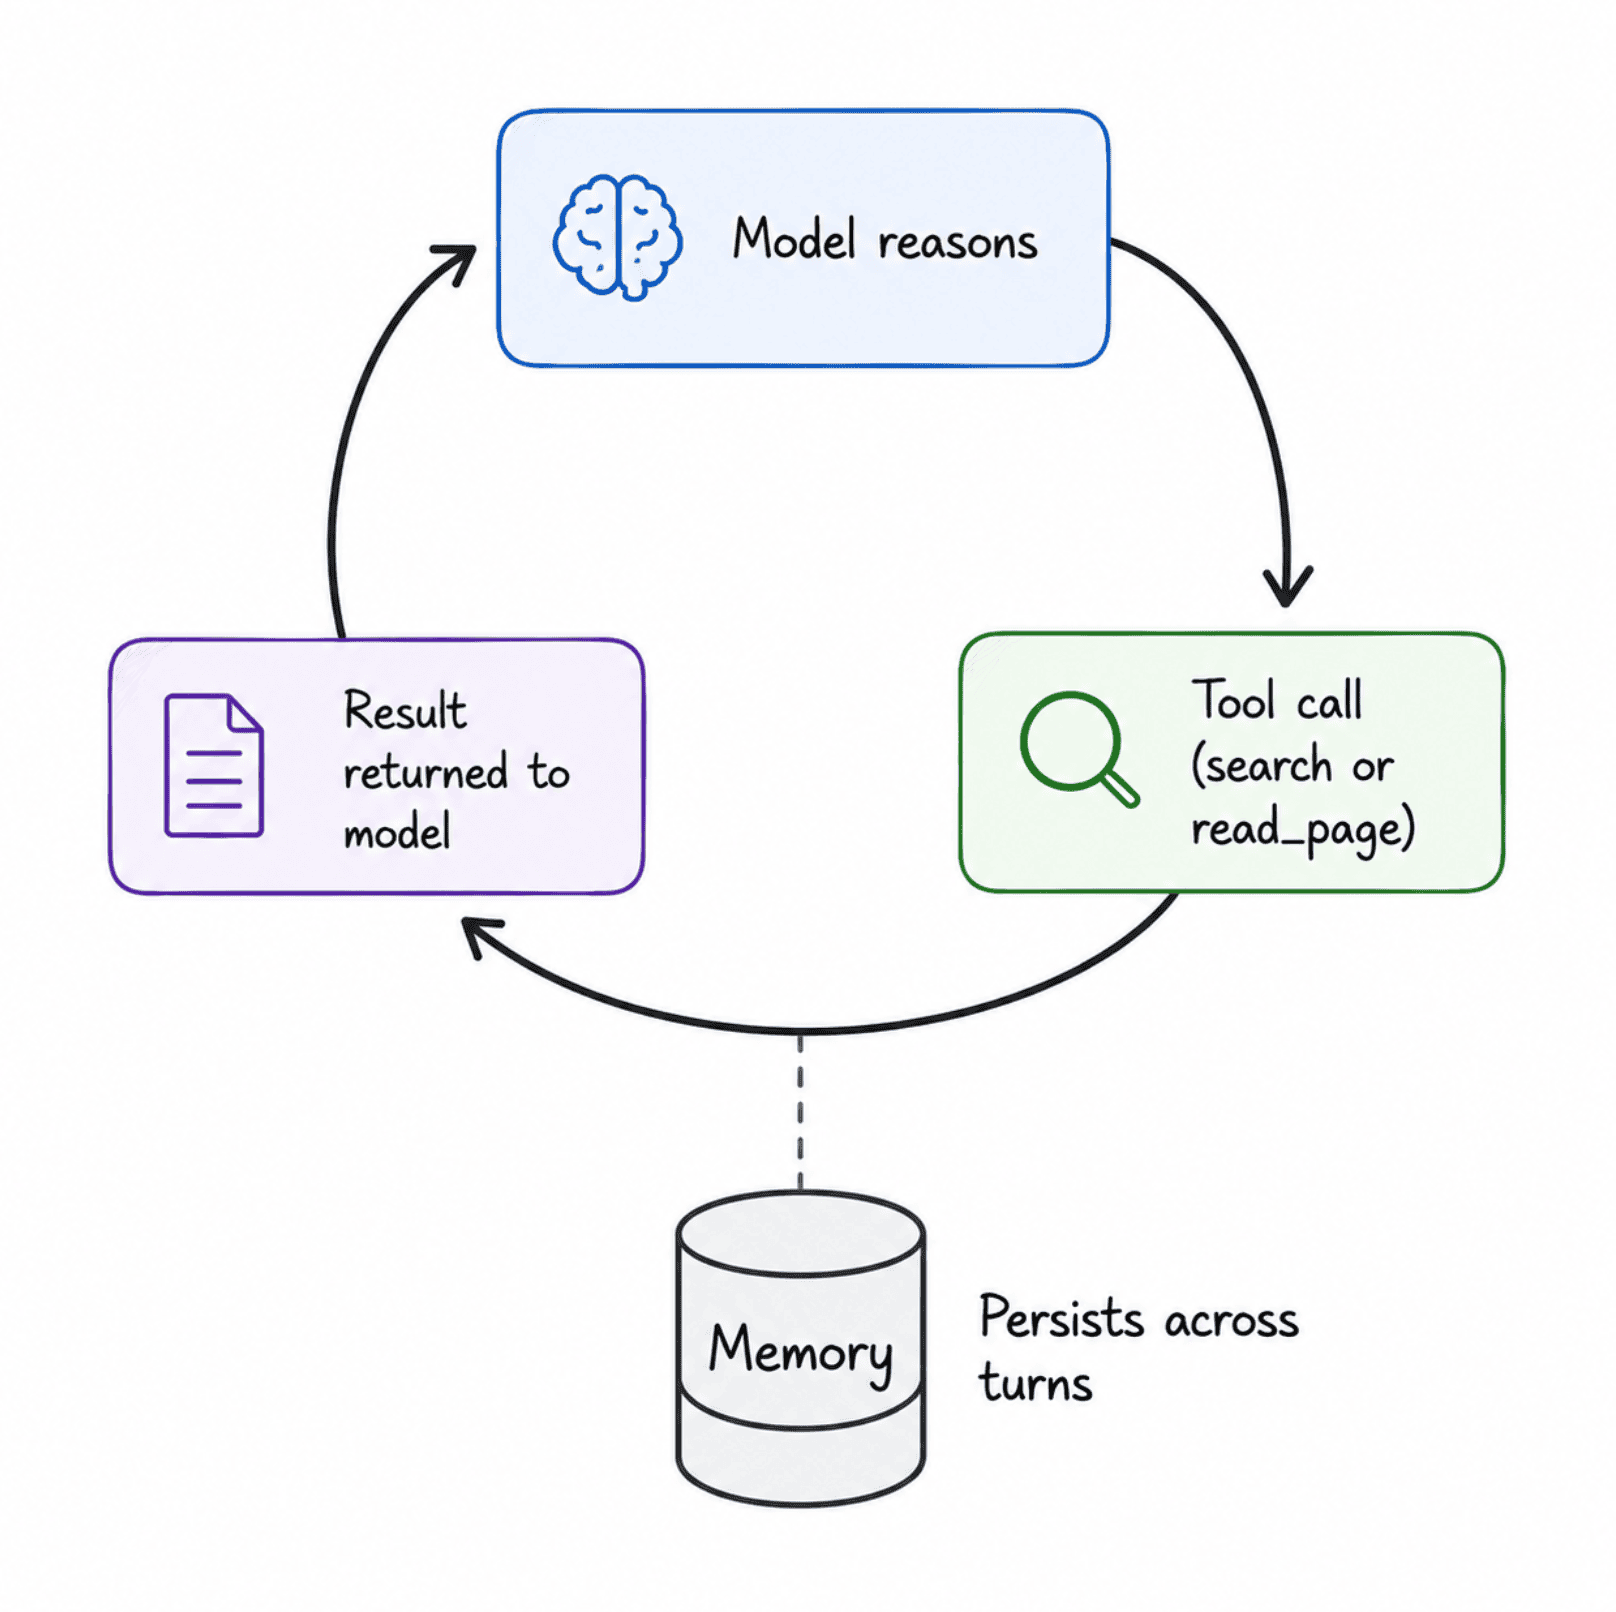
This is the heart of the project: the loop where the agent reads the task, decides whether it needs a tool, calls that tool, reads the result, and decides what to do next. Open agent.py and build it piece by piece.
# agent.py
from dotenv import load_dotenv
from langchain_anthropic import ChatAnthropic
from langchain_community.tools.tavily_search import TavilySearchResults
from langgraph.prebuilt import create_react_agent

# Load API keys from the .env file
load_dotenv()

# Initialize the model. Temperature is kept low because we want
# consistent, grounded output rather than creative variation.
model = ChatAnthropic(
    model="claude-sonnet-4-6",
    temperature=0.2,
    max_tokens=1500,
)

# Set up the search tool. max_results caps how many pages come back
# per search so the agent doesn't drown in low-quality results.
search_tool = TavilySearchResults(max_results=5)

# create_react_agent wires the model and tools into a working loop:
# the model reads the task, decides if it needs the tool, calls it,
# reads the result, and repeats until it has enough to answer.
agent = create_react_agent(model, tools=[search_tool])

def run_research(topic: str) -> str:
    """Takes a topic string and returns the agent's final written brief."""
    result = agent.invoke({
        "messages": [
            (
                "system",
                "You are a research assistant. When given a topic, search "
                "for current, credible information and write a brief under "
                "500 words. Every factual claim must be followed by the "
                "source URL in parentheses. If sources disagree, say so."
            ),
            ("user", topic),
        ]
    })
    # The final message in the returned list is the agent's answer
    return result["messages"][-1].content

if __name__ == "__main__":
    topic = input("What should I research? ")
    print(run_research(topic))
What this does, line by line: load_dotenv() reads your keys from the .env file, so nothing sensitive lives in the code itself. ChatAnthropic sets up the connection to the model, and the low temperature keeps answers grounded rather than inventive, which matters for a research tool where accuracy counts more than variety. TavilySearchResults gives the agent an actual way to reach the live internet instead of relying only on what the model already knows. create_react_agent is LangGraph’s shortcut for building the classic reasoning loop (often called ReAct, short for reasoning and acting) without you having to write the graph nodes and edges by hand. The system message inside run_research is doing real work too: it’s what forces the agent to cite sources and flag disagreement rather than just handing back a confident-sounding paragraph.
Run it from the terminal with python agent.py, give it a topic, and you should get a short brief with links. If it hangs or errors out, check that both keys in your .env file are correct and that you’re in the activated virtual environment.
# Step 5: Giving It Memory and a Second Tool
Right now, the agent forgets everything the moment it finishes. That’s fine for a single question, but it falls apart the moment someone asks a follow-up like “now compare that to X.” We’ll fix that by adding conversation memory, and we’ll add a second tool so the agent can pull a full page’s content when a search snippet isn’t enough detail.
# agent.py (updated)
from dotenv import load_dotenv
from langchain_anthropic import ChatAnthropic
from langchain_community.tools.tavily_search import TavilySearchResults
from langchain_community.document_loaders import WebBaseLoader
from langchain_core.tools import tool
from langgraph.prebuilt import create_react_agent
from langgraph.checkpoint.memory import MemorySaver

load_dotenv()

model = ChatAnthropic(model="claude-sonnet-4-6", temperature=0.2, max_tokens=1500)
search_tool = TavilySearchResults(max_results=5)

@tool
def read_page(url: str) -> str:
    """Fetches the readable text of a single web page, given its URL.
    Use this when a search result snippet doesn't have enough detail."""
    try:
        loader = WebBaseLoader(url)
        docs = loader.load()
        # Trim to 3000 characters so one long page doesn't eat the context budget
        return docs[0].page_content[:3000]
    except Exception as e:
        return f"Could not load that page: {e}"

# The system prompt now lives on the agent itself. Once a checkpointer is
# saving history, re-sending it with every call would stack up duplicate
# copies of the same instructions inside the thread.
SYSTEM_PROMPT = (
    "You are a research assistant. Search for current, credible "
    "information and write a brief under 500 words. Cite every claim "
    "with the source URL in parentheses. Use the read_page tool when a "
    "search snippet is too thin to confirm a fact."
)

# MemorySaver checkpoints the conversation so the agent remembers
# earlier turns within the same thread_id
memory = MemorySaver()

agent = create_react_agent(
    model,
    tools=[search_tool, read_page],
    prompt=SYSTEM_PROMPT,
    checkpointer=memory,
)

def run_research(topic: str, thread_id: str = "default") -> str:
    """thread_id lets you keep separate memory per user or session."""
    config = {"configurable": {"thread_id": thread_id}}
    result = agent.invoke({"messages": [("user", topic)]}, config=config)
    return result["messages"][-1].content

if __name__ == "__main__":
    thread = "cli-session-1"
    while True:
        topic = input("nWhat should I research? (or 'quit') ")
        if topic.lower() == "quit":
            break
        print(run_research(topic, thread_id=thread))
What changed and why: WebBaseLoader gives the agent a second tool, read_page, that fetches the full text of a specific URL rather than the short snippet a search returns. The @tool decorator is what turns a normal Python function into something the agent can call on its own, and the docstring right under the function definition isn’t just documentation; the model actually reads it to decide when the tool is useful. MemorySaver is LangGraph’s built-in checkpointer, and it’s what lets the agent recall earlier turns in the same conversation instead of treating every message as a fresh start. That’s also why the system prompt moved out of run_research and onto the agent itself — anything you pass in the messages list gets written into the saved thread, so a system message sent on every call would pile up copies of itself. The thread_id is the key that separates one conversation’s memory from another’s, so if you were serving multiple users, each one would get their own thread rather than bleeding into someone else’s session.
# Step 6: Adding Guardrails Before You Trust It
An agent that can search and read is low risk. An agent that can act on what it finds is a different conversation entirely, and even a read-only agent needs boundaries around cost, runaway loops, and bad input. This is the step most tutorials skip, and it’s a real reason so many agent projects stall before reaching production.
# agent.py (guardrails added)
# add "import time" to the imports at the top of the file
import time

MAX_TOPIC_LENGTH = 300
MAX_RETRIES = 2
RECURSION_LIMIT = 15

def validate_topic(topic: str) -> str:
    """Rejects empty or suspiciously long input before it reaches the model."""
    topic = topic.strip()
    if not topic:
        raise ValueError("Topic can't be empty.")
    if len(topic) > MAX_TOPIC_LENGTH:
        raise ValueError(f"Keep the topic under {MAX_TOPIC_LENGTH} characters.")
    return topic

def run_research_safely(topic: str, thread_id: str = "default") -> str:
    """Wraps the agent call with input validation, a retry on transient
    failures, and a hard cap so one bad run can't loop forever."""
    topic = validate_topic(topic)

    for attempt in range(1, MAX_RETRIES + 1):
        try:
            # recursion_limit caps how many reasoning/tool-call steps
            # the agent can take in a single run, preventing runaway loops
            result = agent.invoke(
                {"messages": [("user", topic)]},
                config={
                    "configurable": {"thread_id": thread_id},
                    "recursion_limit": RECURSION_LIMIT,
                },
            )
            return result["messages"][-1].content
        except Exception as e:
            if attempt == MAX_RETRIES:
                return f"Research failed after {MAX_RETRIES} attempts: {e}"
            time.sleep(2)  # brief pause before retrying
What this does: validate_topic catches obviously bad input — empty strings or absurdly long text — before it ever reaches the model, which saves an API call and a confusing error message. recursion_limit is the single most important setting in this block: it caps how many steps the agent can take in one run, so a search that keeps returning unhelpful results can’t turn into an infinite loop that quietly burns through your API budget. The retry loop handles the ordinary case of a network blip or a rate limit, giving it one more chance before giving up cleanly instead of crashing. Notice that the system prompt doesn’t appear here at all, because it’s attached to the agent from the previous step and applies to every call automatically.
If you ever extend this agent to take actions beyond searching and reading (sending an email, posting somewhere, writing to a shared file), that’s the point where you add a human approval step before the action executes, not after. A read-only research agent doesn’t strictly need that gate, but it’s worth building the habit here so it’s second nature on your next, riskier project.
# Step 7: Deploying It Somewhere Real
A working script on your laptop isn’t a deployed agent. To make this callable from anywhere, we’ll wrap it in a small API with FastAPI, containerize it with Docker, and ship it to Railway, which is one of the more straightforward paths for exactly this kind of CPU-bound, non-GPU agent workload.
First, the API wrapper:
# app.py
from fastapi import FastAPI, HTTPException
from pydantic import BaseModel
from agent import run_research_safely

app = FastAPI(title="Research Agent API")

class ResearchRequest(BaseModel):
    topic: str
    thread_id: str = "default"

@app.get("/health")
def health_check():
    """Basic health check so the hosting platform knows the service is alive."""
    return {"status": "ok"}

@app.post("/research")
def research(request: ResearchRequest):
    """Accepts a topic and returns the agent's written brief."""
    try:
        brief = run_research_safely(request.topic, request.thread_id)
        return {"topic": request.topic, "brief": brief}
    except ValueError as e:
        raise HTTPException(status_code=400, detail=str(e))
What this does: FastAPI turns your Python function into an HTTP endpoint that any application, front-end, or script can call with a simple POST request. The /health route matters more than it looks like it should: hosting platforms ping this endpoint to check the service is actually alive, and without it, a slow deploy or a crashed process can look “up” when it isn’t. The try/except block converts a bad input into a proper 400 error response instead of a confusing 500 crash.
Now the dependencies:
# requirements.txt
langgraph
langchain-anthropic
langchain-community
tavily-python
beautifulsoup4
python-dotenv
fastapi
uvicorn
And the container:
# Dockerfile
FROM python:3.11-slim

WORKDIR /app

# Install dependencies first so Docker can cache this layer
# and skip reinstalling on every code change
COPY requirements.txt .
RUN pip install --no-cache-dir -r requirements.txt

# Copy the application code
COPY . .

# Railway and most platforms inject a PORT variable at runtime, so read it
# here and fall back to 8000 when you run the container locally
EXPOSE 8000
CMD ["sh", "-c", "uvicorn app:app --host 0.0.0.0 --port ${PORT:-8000}"]
What this does: copying requirements.txt and installing it before copying the rest of the code is a small trick that speeds up rebuilds. Docker only reinstalls dependencies when that file changes, not every time you edit a line of Python. The uvicorn command is what actually starts the FastAPI server inside the container, listening on all network interfaces so the hosting platform can route traffic to it, and reading the port from the environment so it works both locally and on a host that assigns one for you. Add a .dockerignore containing .env and venv/ as well, so COPY . . doesn’t bake your keys into the image.
Deploying to Railway from here is a matter of pushing this repository to GitHub, connecting it in the Railway dashboard, and adding your two API keys as environment variables in the project settings rather than in the code. Railway detects the Dockerfile automatically, builds it, and gives you a public URL. This fits the pattern most current guides recommend for agent orchestration layers, specifically because this kind of workload is CPU-bound Python rather than GPU inference, so you don’t need to pay for or manage GPU infrastructure at all. If your agent later needs to run its own model weights or heavier compute, Modal is the natural next stop, but for a tool-calling agent like this one, a straightforward container host is enough.
Once it’s live, calling your agent from anywhere looks like this:
curl -X POST https://your-app.up.railway.app/research
  -H "Content-Type: application/json"
  -d '{"topic": "current trends in solid-state batteries"}'
That single request is the whole point of the last six steps: a topic goes in, a real HTTP call triggers the agent loop, and a sourced brief comes back, running on infrastructure you don’t have to babysit from a terminal window.
# Wrapping Up
You now have an agent that searches, reads, remembers, guards against its own failure modes, and answers to a real URL instead of a local terminal. That’s further than most first agent projects get, and the gap between this and the demos everyone else is stuck on is almost entirely the guardrails and deployment work most tutorials skip.
From here, the next reasonable step is adding a third tool (maybe a way to save briefs to a database instead of just returning them), or, if you move on to a bigger multi-agent system, looking at how a CrewAI prototype could sit in front of the same LangGraph core for the parts that need faster iteration. Either way, you’ve already done the hard part; you have something running that other people can actually use.
Shittu Olumide is a software engineer and technical writer passionate about leveraging cutting-edge technologies to craft compelling narratives, with a keen eye for detail and a knack for simplifying complex concepts. You can also find Shittu on Twitter.